Struggling with making clean, precise holes in various materials? Standard drill bits just not cutting it for those larger openings? You’re not alone in this frustrating DIY dilemma.
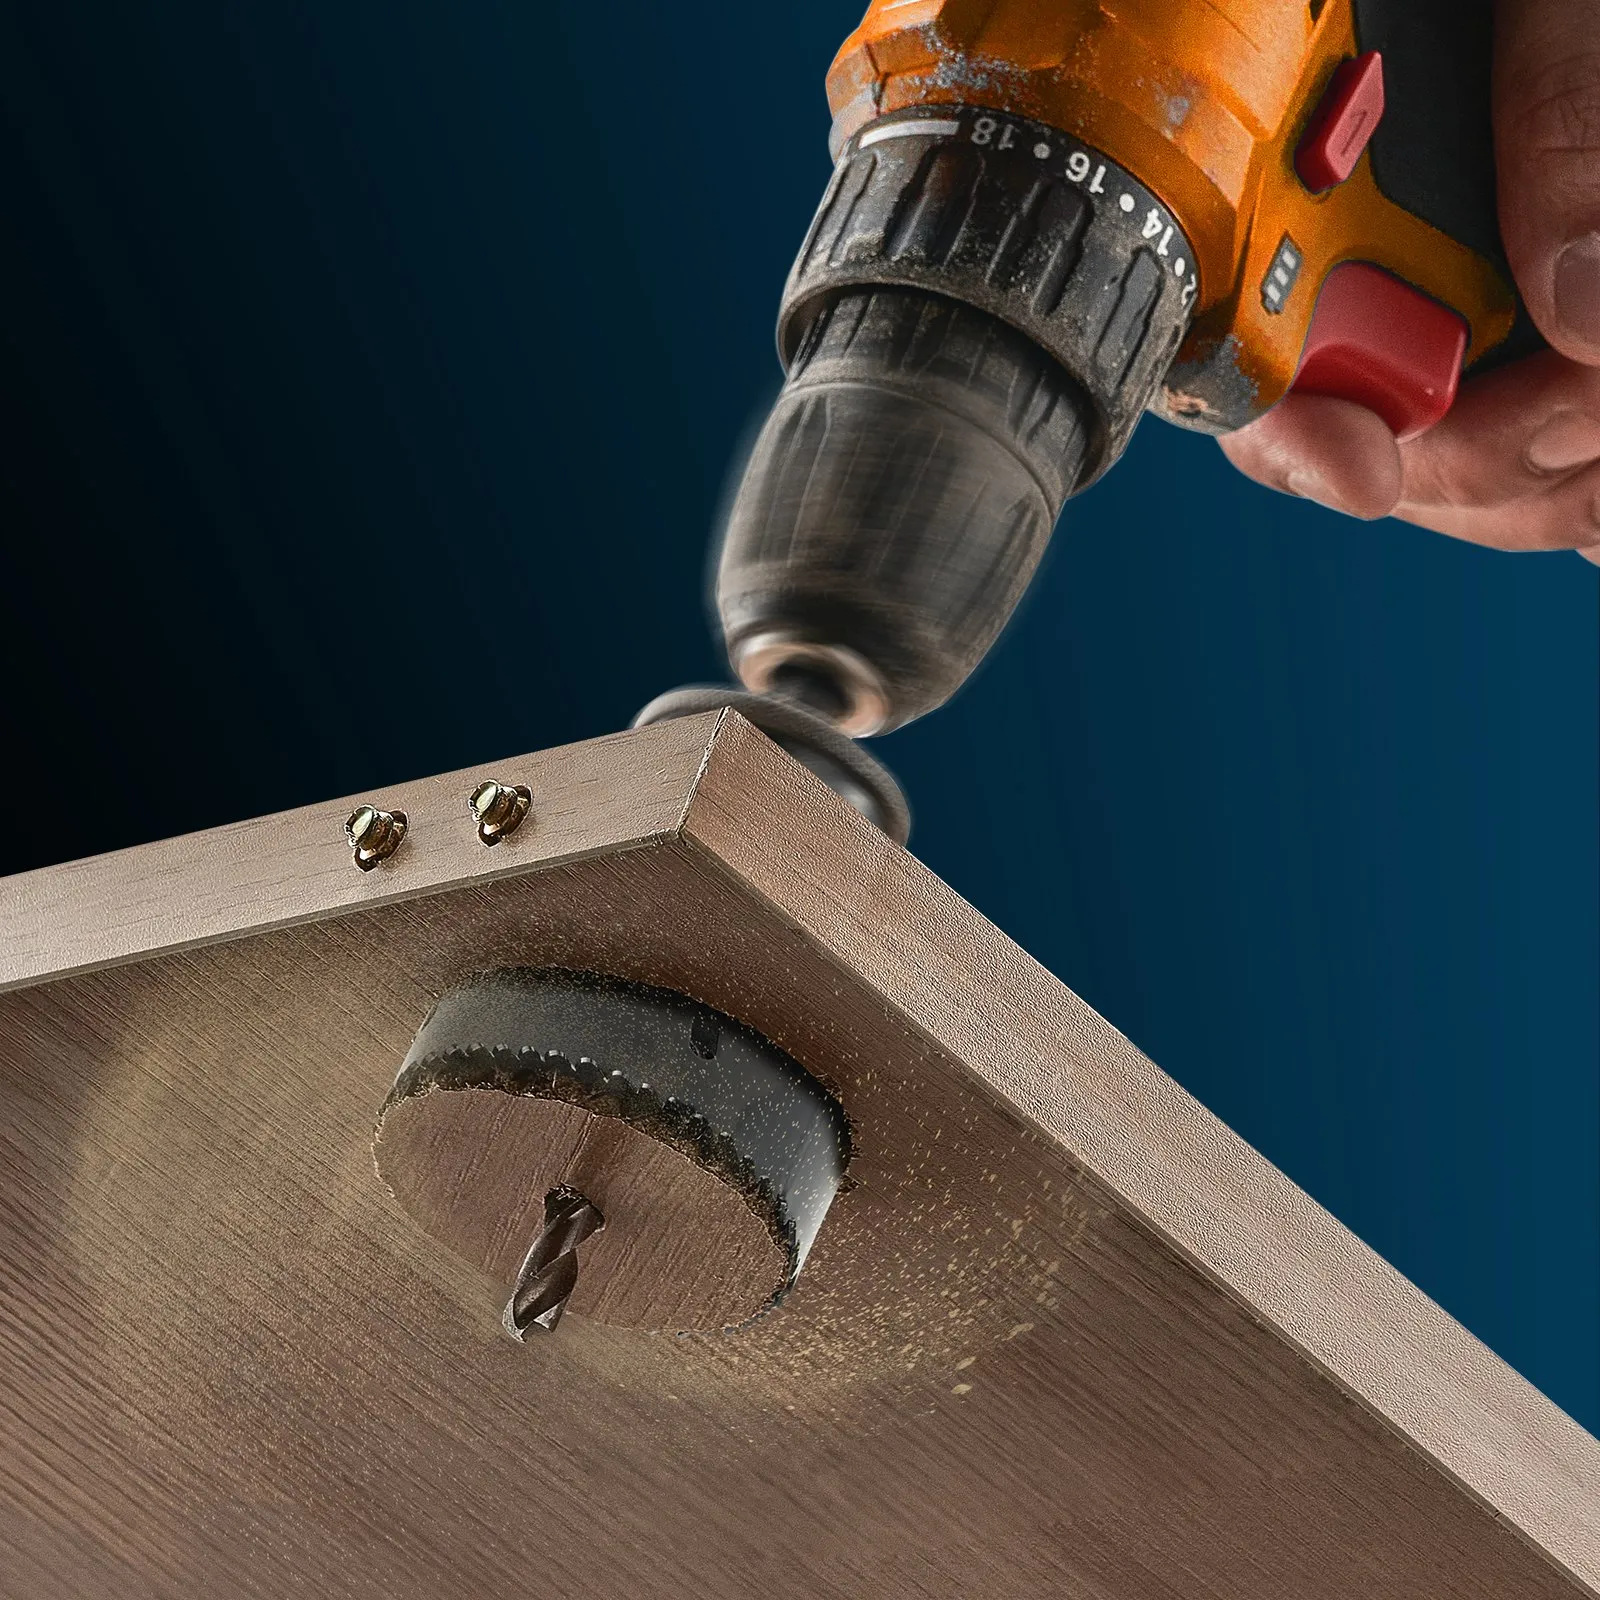
A hole saw is a specialized circular cutting tool that attaches to your drill, designed to create clean, precise holes of larger diameters than standard drill bits. With teeth along its circular edge and mounted on an arbor, it rotates to cut through materials while preserving the core, making it efficient for various applications.
Whether you’re a professional tradesperson or a weekend DIY enthusiast, understanding hole saws can transform your projects. This guide will walk you through everything you need to know about choosing and using these versatile tools effectively.
What is a Hole Saw?
Ever tried making a large, clean hole with a regular drill bit? The struggle is real, often resulting in jagged edges and hours of frustration.
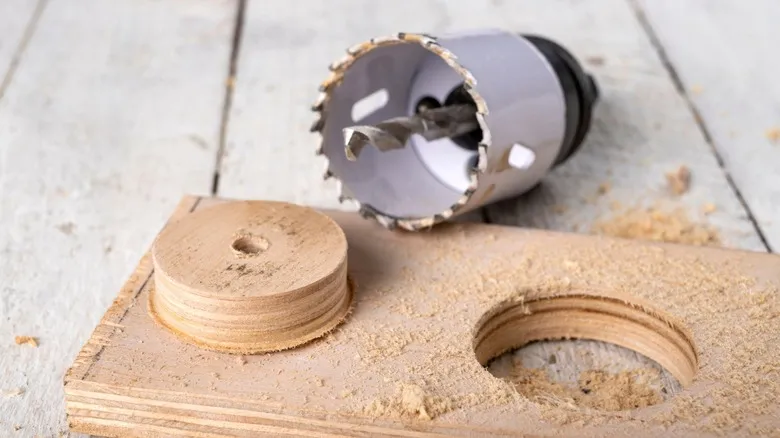
A hole saw is a circular saw blade with teeth on its outer edge that mounts on an arbor (a rod fitting into a drill chuck). When the drill activates, the hole saw rotates, cutting through materials to create precise circular holes of larger diameters than standard bits can achieve.
A hole saw or hole cutter stands apart from standard drill bits in both design and function. Unlike traditional drill bits that remove all material in their path, hole saws cut only around the perimeter of the hole, leaving the core intact until removal. This design makes them significantly more efficient for creating larger openings.
Key Features of Hole Saws
Hole saws come in various designs, but most share these fundamental characteristics:
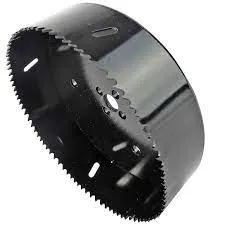
Cylindrical Design: The main body is a hollow metal cylinder with cutting teeth along one edge
Thin Walls: Quality hole saws feature relatively thin walls compared to their diameter, reducing friction during cutting
Mounting System: All hole saws include some method of attachment to a drill, typically via an arbor
Variable Sizes: Available in numerous diameters to suit different project requirements
When to Use a Hole Saw
Hole saws excel in specific situations where other cutting tools might struggle:
Creating holes for plumbing pipes and fixtures
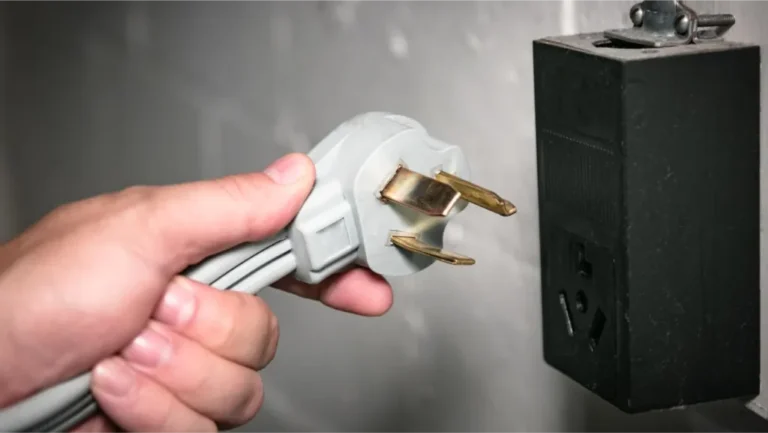
Installing electrical outlets and switches
Mounting door hardware like locks and handles
Fitting downlights and other recessed lighting
Installing ventilation ducts and components
The versatility of hole saws makes them indispensable for both construction professionals and DIY enthusiasts. Their ability to create clean, precise holes of consistent diameter saves time and improves the quality of finished work.
Types of Hole Saws
Faced with a shelf full of different hole saws at the hardware store? The overwhelming variety can leave you second-guessing which one will actually work for your specific project.
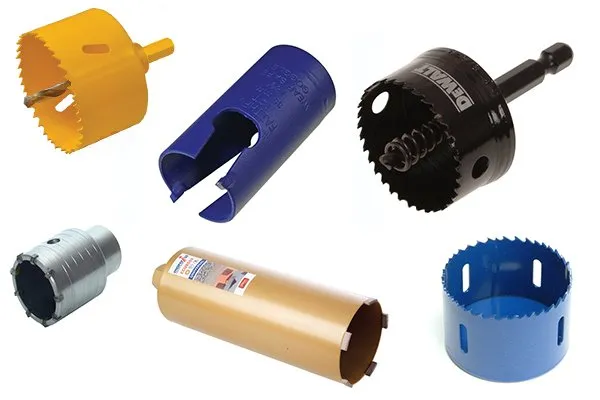
Hole saws come in several types, with bi-metal and tungsten carbide being the most common. Bi-metal saws combine steel and high-speed steel, making them affordable and suitable for wood and plastic. Tungsten carbide saws, though more expensive, offer superior durability and can cut through harder materials like metal and masonry.
The market offers numerous types of hole saws, each designed for specific materials and applications. Understanding these differences is crucial for selecting the right tool for your project.
Bi-Metal Hole Saws
Bi-metal hole saws are the workhorses of the hole saw family and the most commonly used type.
Construction: Made from a combination of carbon steel bodies with high-speed steel teeth
Durability: More durable than carbon steel saws but less so than tungsten carbide
Best For: Wood, plastic, thin metal sheets, plasterboard, fibreboard, and plywood
Advantages: Good balance of performance and cost; versatile across multiple materials
Limitations: May dull quickly when used on harder materials
Tungsten Carbide Hole Saws
When dealing with tougher materials, tungsten carbide hole saws offer superior performance.
Construction: Made with tungsten carbide teeth brazed to a steel body
Durability: Extremely durable with excellent heat resistance
Best For: Metal, masonry, ceramic tile, and other hard materials
Advantages: Long-lasting sharpness; can handle the toughest cutting jobs
Limitations: More expensive than other types; can be brittle if misused
Diamond-Edged Hole Saws
For the hardest materials, diamond-edged hole saws provide unmatched cutting ability.
Construction: Diamond grit embedded in the cutting edge
Durability: Exceptional durability when used properly
Best For: Glass, ceramic tile, porcelain, stone, and other extremely hard materials
Advantages: Can cut materials other saws cannot touch
Limitations: Expensive; requires water cooling during use; slower cutting speed
HSS-G (Ground) Hole Saws
These standard hole saws are suitable for lighter-duty applications.
Construction: Made from ground high-speed steel
Durability: Moderate durability for light-duty use
Best For: Everyday DIY tasks on softer materials
Advantages: Affordable; adequate for occasional use
Limitations: Not suitable for heavy-duty or industrial applications
Carbon Steel Hole Saws
The most basic and affordable option in the hole saw family.
Best For: Soft woods, thin plastics, and other soft materials
Advantages: Very affordable; adequate for one-off projects
Limitations: Short lifespan; not suitable for harder materials
Specialized Hole Saws
Beyond these main categories, you’ll find specialized hole saws for specific applications:
Welded Shank Soffit Cutters: Pre-fitted with arbors for cutting soffit boards
Multi-Hole Saws: Feature multiple cutting edges for faster material removal
Adjustable Hole Saws: Can be set to different diameters for versatile cutting
Parts of a Hole Saw
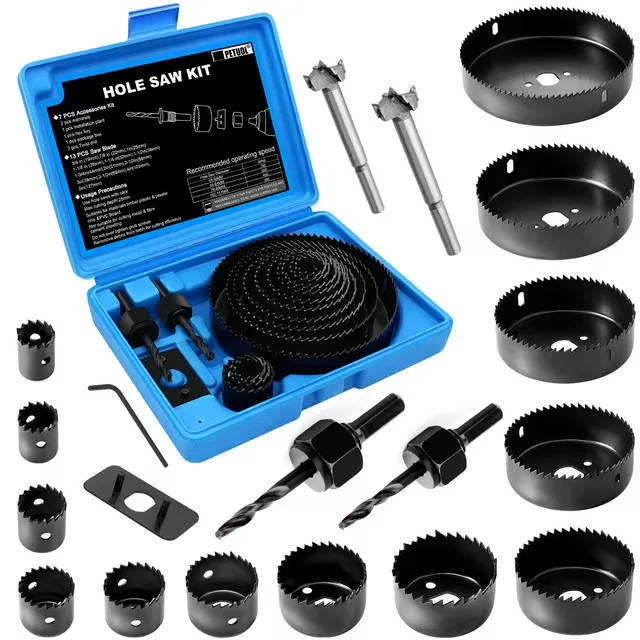
Confused by all the components that come with your hole saw kit? Understanding each part is essential for proper assembly and effective use.
A hole saw consists of three main components: the cutting teeth that do the actual cutting, the slots that allow chips to escape during operation, and the pilot drill with arbor that helps position and stabilize the saw. These parts work together to create clean, precise holes.
Understanding the individual components of a hole saw is crucial for proper use and maintenance. Each part plays a specific role in the cutting process.
Cutting Teeth
The teeth are perhaps the most critical component of any hole saw, as they determine cutting performance.
Function: Perform the actual cutting of the material
Design Variations:
Variable pitch teeth provide smoother cuts with reduced wear
Constant pitch teeth produce finer cuts but work more slowly
Teeth Per Inch (TPI):
Low TPI (1-4): Creates faster cuts with rougher finish
High TPI (10+): Produces slower cuts with smoother finish
Slots and Ejection Ports
These openings in the side of the hole saw serve multiple purposes.
Function: Allow chips and dust to escape during cutting
Benefits:
Prevent binding and overheating
Make it easier to clear material buildup
Improve cutting efficiency
Variations: Some models feature “speed slots” specifically designed for easier plug removal
Pilot Drill and Arbor
The centering and mounting system is crucial for accurate hole placement.
Pilot Drill Function:
Creates a guide hole for the saw to follow
Prevents the saw from wandering during initial contact
Typically extends 10-30mm beyond the cutting edge
Arbor Function:
Connects the hole saw to the drill
Holds the pilot drill in place
Provides stability during cutting
Ejector Springs
Not all hole saws include this component, but it’s a valuable addition.
Function: Helps push the cut plug out of the hole saw
Benefits:
Saves time between cuts
Prevents material buildup inside the saw
Reduces the need to manually clear the saw
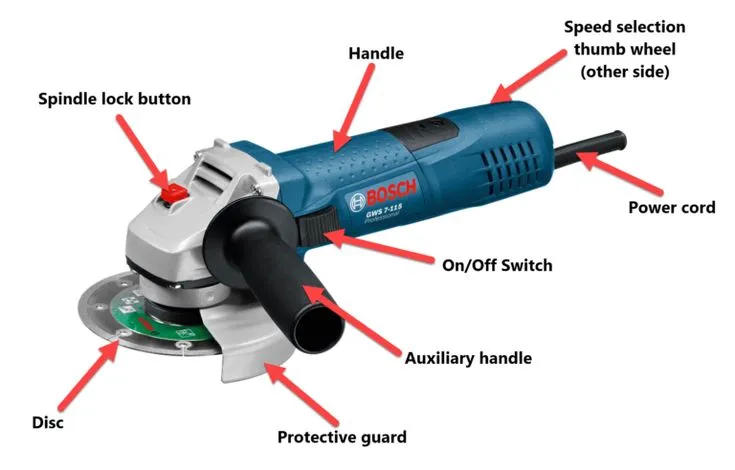
Shank
The portion that connects to your drill’s chuck.
Function: Provides the connection point to the power tool
Types:
Hex shanks for quick-change systems
Round shanks for traditional chucks
SDS shanks for hammer drills
How to Choose a Hole Saw
Standing in the tool aisle, overwhelmed by options? Choosing the wrong hole saw can lead to frustration, wasted materials, and potentially dangerous situations.
When selecting a hole saw, consider three key factors: the material you’re cutting (choose bi-metal for wood and plastic, tungsten carbide for metal), the hole size needed (match the diameter precisely), and the number of teeth (more teeth for smoother cuts, fewer for faster cutting).
Selecting the right hole saw for your project involves considering several important factors. Making the correct choice will ensure better results and extend the life of your tool.
Material Compatibility
The most important consideration is matching the hole saw to the material you’ll be cutting.
Material Type
Recommended Hole Saw Type
Soft Wood
Carbon Steel or Bi-Metal
Hardwood
Bi-Metal with Variable Pitch
Plastic
Bi-Metal or Carbon Steel
Thin Metal (<3mm)
Bi-Metal with High TPI
Thick Metal (>3mm)
Tungsten Carbide
Ceramic Tile
Diamond-Edged
Masonry/Concrete
Diamond-Edged or Tungsten Carbide
Glass
Diamond-Edged with Water Cooling
Size Selection
Choosing the correct diameter is crucial for your project’s success.
Exact Matching: Select a hole saw that precisely matches the diameter you need
Common Sizes: Most manufacturers offer standard sizes that correspond to common pipe, conduit, and fixture dimensions
Measurement: Always measure twice before purchasing to avoid wasted cuts
Depth Consideration: Check the cutting depth specification if working with thicker materials
Tooth Configuration
The number and arrangement of teeth affect both cutting speed and finish quality.
Teeth Per Inch (TPI):
Lower TPI (1-4): Faster cutting but rougher finish
Higher TPI (10+): Smoother finish but slower cutting
Tooth Design:
Variable pitch: Reduces vibration and provides smoother operation
Constant pitch: More consistent cutting depth per revolution
Quality and Construction
Investing in quality pays dividends in performance and longevity.
Material Quality: Higher-grade steel and manufacturing processes result in longer-lasting tools
Wall Thickness: Thinner walls reduce friction but must be balanced with structural integrity
Coating: Some hole saws feature special coatings to reduce friction and heat buildup
Brand Reputation: Established tool manufacturers typically offer better quality control and warranties
How to Use a Hole Saw
First-time using a hole saw? The process can seem intimidating, and mistakes can damage both your materials and the tool itself.
To use a hole saw effectively, first assemble it by inserting the arbor through the back of the saw and securing it. Attach it to your drill, position it perpendicular to your work surface, and begin drilling slowly with gentle pressure, occasionally backing out to clear debris. After completing the hole, remove the waste material.
Using a hole saw properly requires attention to technique and safety. Following these steps will help you achieve clean, accurate holes while extending the life of your tool.
Preparation and Assembly
Before cutting, proper setup is essential for success.
Assemble the Components:
Insert the arbor through the back of the hole saw
Secure the hole saw to the arbor following manufacturer’s instructions
Ensure all connections are tight
Prepare Your Workpiece:
Mark the center point of your intended hole
Secure the workpiece firmly to prevent movement
For thin materials, back them with scrap wood to prevent splintering
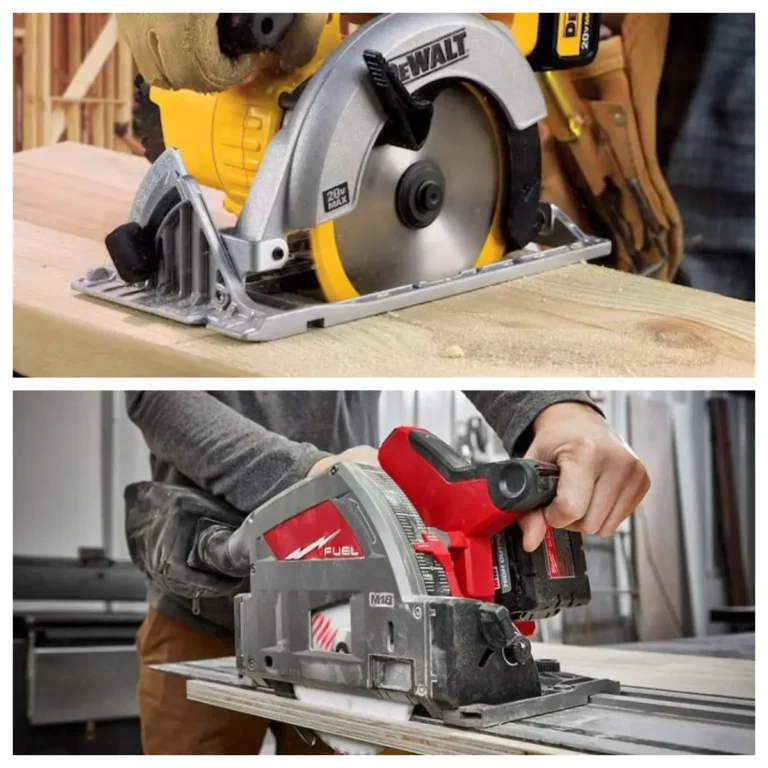
Prepare Your Drill:
Use an appropriately powerful drill (14V minimum for harder materials)
Set to the correct speed range (lower speeds for metal, higher for wood)
Ensure the battery is fully charged for cordless models
Cutting Technique
Proper technique ensures clean cuts and prevents tool damage.
Starting the Cut:
Position the pilot bit on your marked center point
Hold the drill perpendicular (90°) to the work surface
Start at a slow speed until the pilot bit is engaged
Gradually increase speed as the hole saw teeth make contact
During Cutting:
Apply gentle, consistent pressure
Let the saw do the work—forcing can cause binding
Periodically back the saw out to clear chips and prevent overheating
For deeper cuts, withdraw completely to clear the plug if necessary
Finishing the Cut:
Maintain steady pressure until you break through
For cleaner exit holes, stop when the pilot bit breaks through and complete the cut from the opposite side if possible
Plug Removal
After cutting, you’ll need to remove the waste material from inside the hole saw.
Using Ejection Features:
If your hole saw has an ejector spring, it may push the plug out automatically
Use the ejection slots on the side of the hole saw to pry out the plug
Manual Removal Methods:
Insert a flat screwdriver through the ejection slots to push the plug out
Tap the side of the hole saw gently to loosen the plug
For stubborn plugs, drill a small hole through the side of the plug and use a wire to pull it out
Special Techniques
Some situations require modified approaches for best results.
Cutting Larger Holes:
For holes larger than 2 inches (50mm), consider drilling in stages
Start with a smaller hole saw, then use a hole saw rework adapter to cut the final size
Preventing Blowout:
When cutting all the way through, wait until the pilot bit emerges
Flip the workpiece and complete the cut from the opposite side
Alternatively, clamp a backing board behind your workpiece
Cutting Existing Holes:
Use a hole saw rework adapter to guide the larger hole saw
The smaller hole acts as a guide for the larger cutter
Safety Considerations
Ignoring safety precautions with power tools can lead to serious injuries. Hole saws, with their sharp teeth and high-speed rotation, present specific hazards.
Before using a hole saw, always wear appropriate safety gear including goggles, gloves, and a dust mask. Ensure your workpiece is securely clamped, use the correct drill power for the material, and never force the tool through the material faster than it naturally cuts.
Safety should always be your primary concern when working with hole saws. These powerful cutting tools require respect and proper precautions.
Personal Protective Equipment
Always wear appropriate safety gear when operating hole saws.
Eye Protection: Safety goggles or glasses to protect from flying debris
Hearing Protection: Ear plugs or muffs to protect from the high-pitched sound of cutting
Respiratory Protection: Dust mask appropriate for the material being cut
Hand Protection: Work gloves that provide grip while maintaining dexterity
Clothing Considerations: Avoid loose clothing, roll up sleeves, and tie back long hair
Workspace Safety
Prepare your work area properly before beginning.
Secure Workpieces: Always clamp materials firmly to prevent spinning or movement
Clear Area: Remove clutter and ensure stable footing around your work area
Lighting: Ensure adequate lighting to see your work clearly
Fire Safety: Have appropriate fire extinguishing equipment nearby, especially when cutting metal
Ventilation: Ensure proper airflow when cutting materials that produce harmful dust
Tool Safety
Using the tool correctly prevents accidents and injuries.
Power Requirements: Use an appropriately powerful drill for the material and hole saw size
Speed Settings: Use lower speeds for harder materials and larger diameter hole saws
Perpendicular Positioning: Always keep the drill perpendicular to the work surface
Controlled Pressure: Never force the hole saw through the material
Regular Breaks: Allow the tool to cool down during extended use to prevent overheating
Material-Specific Precautions
Different materials present unique safety challenges.
Metal: Be aware of sharp edges and hot chips; use cutting fluid when appropriate
Glass and Ceramic: Use water cooling to prevent overheating and cracking
Plastics: Be cautious of melting and potentially harmful fumes
Treated Wood: Be aware of potentially toxic dust from preservatives
Applications and Uses
Wondering if a hole saw is the right tool for your specific project? Understanding its ideal applications can save you time and frustration.
Hole saws excel in creating precise circular holes for plumbing installations, electrical work, and door hardware. They’re the preferred tools for professionals in construction trades, particularly plumbers and electricians, who need clean holes for pipes, wiring, and fixtures.
Hole saws are versatile tools with applications across numerous trades and DIY projects. Understanding where they excel helps you make the most of their capabilities.
Professional Applications
Hole saws are essential tools in several trades.
Plumbing Applications
Plumbers rely heavily on hole saws for various installations:
Creating holes for pipe runs through joists and studs
Installing drainage systems and waste pipes
Fitting sink and bath fixtures
Creating access points for water supply lines
Mounting faucets and taps
Electrical Applications
Electricians use hole saws for numerous tasks:
Installing electrical outlets and switches
Running cable and conduit through walls and floors
Mounting junction boxes and panels
Installing recessed lighting fixtures
Creating access points for wiring harnesses
Carpentry Applications
Carpenters find hole saws invaluable for:
Installing door hardware like locks and handles
Creating holes for cabinet fixtures
Mounting drawer pulls and knobs
Installing ventilation grilles
Creating pass-throughs for cables and wires
DIY and Home Improvement
Homeowners and DIY enthusiasts benefit from hole saws for various projects:
Installing door viewers and peepholes
Mounting curtain rods and blinds
Creating holes for computer desk cable management
Installing bathroom accessories
Setting up home entertainment systems with concealed wiring
Material-Specific Applications
Hole saws are used across a wide range of materials:
Confused about whether you need a hole saw or a core drill? This common dilemma can lead to purchasing the wrong tool for your specific needs.
While hole saws and core drills both cut circular holes by removing only the perimeter material, they differ significantly in application. Hole saws are versatile tools for various materials and DIY projects, while core drills are specialized industrial tools primarily for metal and masonry, typically used with magnetic drilling machines.
Though similar in basic function, hole saws and core drills have distinct differences that make each better suited for specific applications. Understanding these differences helps you choose the right tool for your project.
Basic Similarities
Both tools share some fundamental characteristics:
Both cut only the perimeter of the hole, leaving the core intact
Both create clean, precise circular holes
Both require pilot guidance for accurate positioning
Both are available in various diameters for different applications
Key Differences
Despite these similarities, several important factors distinguish these tools:
Design and Construction
Hole Saws:
Typically shorter in length (usually under 50mm depth)
Designed to mount directly to standard drills
Available in various materials for different cutting applications
Generally have a simpler construction
Core Drills:
Often longer for deeper cutting capacity
Designed for use with specialized magnetic drilling machines
Primarily made for metal cutting with high-speed steel or carbide construction
More robust construction for industrial applications
Application Focus
Hole Saws:
More versatile across different materials
Better for wood, plastic, and thin metals
Commonly used in construction and DIY projects
Ideal for electrical and plumbing installations
Core Drills:
Specialized for metal and masonry
Superior performance on thicker steel
Used primarily in industrial and manufacturing settings
Designed for precision engineering applications
Performance Characteristics
Characteristic
Hole Saw
Core Drill
Cutting Speed
Moderate
Faster in appropriate materials
Precision
Good
Excellent
Depth Capacity
Limited (typically <50mm)
Greater (can exceed 100mm)
Heat Management
Basic
Advanced cooling channels
Cost
More affordable
More expensive
Versatility
High across materials
Specialized for specific materials
Choosing Between Them
Consider these factors when deciding which tool is right for your project:
Material: For wood, plastic, and thin metal, choose a hole saw; for thick metal or masonry, consider a core drill
Frequency of Use: For occasional use, a hole saw is more economical; for regular industrial use, invest in a core drill
Precision Requirements: When extreme precision is needed, core drills typically offer better results
Available Equipment: Core drills often require specialized drilling machines, while hole saws work with standard drills
Conclusion
Hole saws are versatile cutting tools that create clean, precise circular holes across various materials, making them essential for both professionals and DIY enthusiasts tackling plumbing, electrical, and carpentry projects.
FAQ
What size hole saw do I need for a door knob?
Door knobs typically require a 2-1/8 inch (54mm) hole saw for the main hole and a 1 inch (25mm) hole saw for the latch.
Can I use a hole saw on ceramic tile?
Yes, but you need a diamond-edged hole saw specifically designed for ceramic materials, and you should use water for cooling during cutting.
How do I remove a stuck plug from a hole saw?
Use a screwdriver through the ejection slots to push it out, or tap the saw gently on a surface to dislodge it.
What’s the largest size hole saw available?
Standard hole saws typically go up to about 6 inches (152mm), though specialized models can be larger for specific applications.
Do I need to drill a pilot hole before using a hole saw?
If your hole saw has a pilot bit, a separate pilot hole isn’t necessary. Without a pilot bit, drilling a small guide hole is recommended.
How long does a hole saw last?
Lifespan varies by material and usage. Bi-metal hole saws typically last through 20-50 holes in wood, while carbide versions can last significantly longer.
Can I sharpen a hole saw?
Yes, you can sharpen most hole saws with a small file, focusing on the inside edge of each tooth, though replacement is often more practical.
What speed should I run my drill when using a hole saw?
Use slower speeds (300-500 RPM) for metal and harder materials, and moderate speeds (500-900 RPM) for wood and plastic.